Master Page in ASP.NET
- Introduction:
- A Master Page in ASP.NET is a feature that allows developers to define a common layout that can be shared across multiple pages in a web application.
- It serves as a template with placeholders, allowing you to maintain a consistent look and feel across your website while reducing redundancy.
- Content pages then use this master layout while providing their own specific content in defined areas.
- Why Use Master Pages:
- Consistency: A unified look across all pages by using a common layout.
- Maintainability: Changes to the design (e.g., header, footer) need to be made only in the master page, which reflects across all content pages.
- Separation of Concerns: The master page handles the layout, while content pages focus solely on page-specific content.
- Key Concepts of Master Pages
- How Master Pages Work
- When a user requests a content page, the content page merges with the master page at runtime to form the final output.
- The content page provides specific content that is injected into the placeholders defined in the master page.
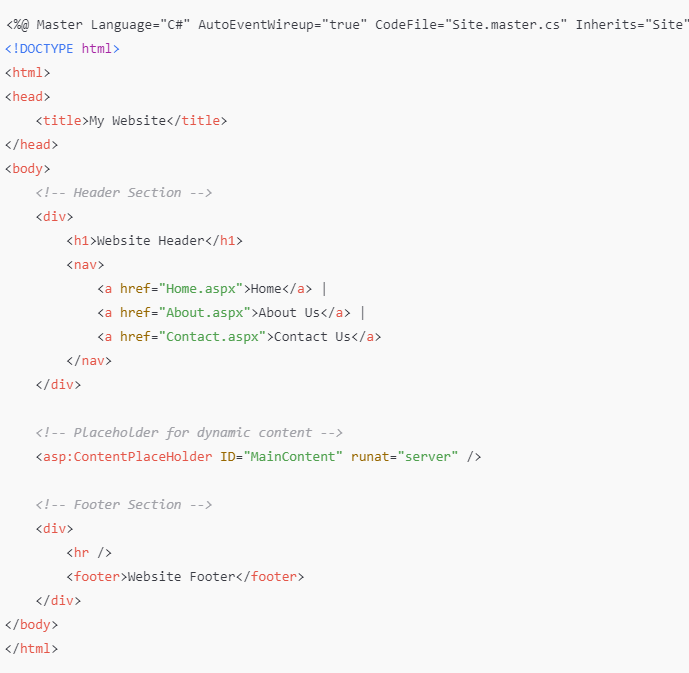
- Master Page Example
- Master Page (
Site.master):
- In this example:
- The header, navigation, and footer sections are part of the master page and will appear on all pages that use this master page.
- The
ContentPlaceHolder named MainContent allows content pages to insert their own specific content.
- Content Page (
Home.aspx):

- In this content page:
- It is linked to the master page using the
MasterPageFile attribute. - The specific content (a heading and a paragraph) is defined within the
Content control, which will be placed in the MainContent placeholder of the master page.
- Advantages of Using Master Pages
- Efficiency: Master Pages reduce duplication of layout code across pages, making the application more maintainable.
- Centralized Updates: Changing the design or layout of a site becomes easier, as you only need to modify the master page instead of updating individual content pages.
- Reusability: The same master page can be reused across different sections of a site or even across multiple applications.
- Modularity: Content pages can focus entirely on their specific content without worrying about repeating the overall site layout.
- Nested Master Pages
- You can also create nested master pages by defining one master page for a certain section of the website and using another master page for more specific subsections.
- This is useful for creating hierarchical layouts within a web application.
- Example:
- Master Page: Contains the layout for the entire site.
- Nested Master Page: Extends the base master page but allows for further customization (e.g., section-specific menus or layouts).
Skin File in ASP.NET
- A Skin file in ASP.NET is a feature of the ASP.NET Themes framework, which allows you to define the look and feel of server-side controls (such as buttons, textboxes, labels, etc.) without embedding styles directly in the HTML or code-behind files.
- Skin files are used to apply consistent styling across an ASP.NET web application by defining default properties for controls.
- Key Concepts of Skin Files:
- ASP.NET Themes: A theme is a collection of files that include skin files, CSS files, and images. These files are stored in a specific theme folder and can be applied to the entire website or specific pages.
- Skin Files (.skin): A skin file defines the visual appearance of controls (like button color, text style, etc.). They are stored in the App_Themes folder in the project and allow developers to set default properties for ASP.NET server controls.
- Control Skin: A skin defines how specific ASP.NET controls (e.g.,
Button, TextBox, etc.) will appear. When a skin is applied, the properties defined in the skin are automatically applied to the controls on the page.
Creating and Using a Skin File
1. Creating the Skin File:
- First, create a folder named App_Themes in your project if it doesn't already exist.
- Inside App_Themes, create a subfolder for the theme, such as MyTheme.
- Add a
.skin file in the MyTheme folder. This file will contain the skin definitions for your controls.
Example: A Basic Skin File
Create a MyTheme.skin file in the App_Themes/MyTheme folder with the following content:
- Skin for
Button: This defines a default background color, font size, and border width for all ASP.NET Button controls on any page using this theme. - Skin for
Label: This applies a green color and font size to all Label controls. - Skin for
TextBox: It sets the font size and border color for TextBox controls.
2. Applying the Theme to the Page or Website:
- Page-Level Theme: You can apply a theme at the page level using the
Theme attribute in the @Page directive. - Application-Level Theme: To apply a theme to the entire application, set the
Theme property in the Web.config file.
- With this configuration, the
MyTheme skin file will automatically apply to all pages in the application.
3. Custom Skin for a Specific Control (Named Skin):
You can create named skins for controls, which allow you to specify different styles for the same type of control. To create a named skin, provide a SkinID attribute in the skin file.
Example: Named Skins for Buttons
In the ASP.NET page, you can then specify which named skin to use by setting the SkinID property:
Advantages of Skin Files in ASP.NET:
- Consistent Styling: Skin files allow for a centralized approach to applying styles to server controls, ensuring that the UI remains consistent across different pages.
- Separation of Concerns: By separating the design from the content and logic of your web application, skin files make maintenance easier and reduce redundancy.
- Easily Changeable Themes: By using themes, including skin files, you can easily switch the entire look and feel of the website by just changing the theme name.
- Customization: Named skins allow different looks for the same control, enabling more flexibility while maintaining overall consistency.
Stylesheet in ASP.NET
- In ASP.NET, stylesheets (CSS) are widely used to define the visual appearance of web pages by controlling the design and layout of HTML elements and ASP.NET server controls.
- ASP.NET allows integration of CSS in various ways, ensuring flexibility in managing the appearance of a web application.
Ways to Use Stylesheets in ASP.NET:
1. Linking External Stylesheets
You can link to an external CSS file to apply consistent styling across multiple pages in an application. This is a common and maintainable approach.
Example:
- Create an external CSS file (e.g.,
styles.css) with your styles:
- Link this stylesheet in the
<head> section of your ASP.NET page or master page:
2. Using Internal Styles
You can define CSS styles directly within the page using the <style> tag in the <head> section. This is suitable for page-specific styles but not ideal for large-scale applications due to limited maintainability.
Example:
3. Using Inline Styles
Inline styles are applied directly to HTML or ASP.NET elements using the style attribute. Although effective for quick customizations, inline styles make the code less maintainable in the long run.
Example:
4. Applying CSS to ASP.NET Server Controls
ASP.NET server controls (like asp:Button, asp:TextBox, etc.) can be styled using external or internal CSS. Use the CssClass property of the control to link it with a CSS class.
Example:

In the above example, the CssClass="button" links the Button control with the .button class defined in the stylesheet.
5. ASP.NET Themes and Skin Files
ASP.NET supports themes, which include CSS files and skin files for consistent control styling across an application. Skin files allow setting default properties for controls in a theme, and CSS is used to further define the appearance.
Example:
- Create a theme folder (e.g.,
App_Themes/MyTheme) and add a .skin file inside it:
- Set the theme in the
Web.config file:
This setup ensures all asp:Button controls use the styling defined in the theme's skin and CSS.
6. Optimizing Stylesheets with Bundling and Minification
ASP.NET includes support for bundling and minification, which optimizes performance by combining multiple CSS files into one and reducing the file size by removing unnecessary characters. This helps improve page load times.
Example:
- In
BundleConfig.cs, register a CSS bundle:
- Render the bundle in your ASP.NET page:
This will combine and minify the CSS files listed in the bundle, reducing the number of HTTP requests and optimizing loading.
Summary
- External Stylesheets: The most maintainable and scalable way to apply CSS in ASP.NET applications by linking external CSS files.
- Internal Styles: Good for small or page-specific customizations but not ideal for large applications.
- Inline Styles: Quick and direct but makes maintenance difficult over time.
- CSS for Server Controls: Use the
CssClass property to apply styles to ASP.NET server controls. - Themes and Skin Files: Use ASP.NET themes to apply consistent control styling across multiple pages or the entire application.
- Bundling and Minification: Enhance performance by reducing CSS file sizes and the number of requests.


Comments
Post a Comment